


August 9, 2022
Refrigerator Repair
If the compressor in your refrigerator is getting too hot, this guide will give you step-by-step instructions to find out the cause of the problem. Sometimes, it can be caused by something as simple as your fridge being in direct sunlight, and sometimes it might be something more serious, like a faulty condenser fan. Whatever the cause, this guide should be able to help you solve it.
Simply start with step one and work your way down the guide until you have found the cause of the problem and hopefully can fix it.
Step 1 – Make sure your refrigerator is in a good location
The best place to start is to check if your refrigerator is positioned out of direct sunlight. If the sun is shining onto the back of your refrigerator, it can make the compressor too hot. This isn’t usually the case, as most builders, architects, etc. will ensure it is located somewhere cool, but before we move on to some of the more complicated causes, it’s a good idea to rule this out. If your fridge is located in a warm location, move it somewhere else in your kitchen or block out any windows that the sun is shining through.
Step 2 – Clean the condenser coils
The condenser coils are located at the back of your refrigerator. When they become dirty or covered in frost, it can cause your compressor to get too hot. To rule out dirty condenser coils as the cause of the problem, it’s a good idea to give them a good clean.
This can be done through the following steps:
- Switch your fridge off and pull it out from the wall.
- If your condenser coil unit has a cover over it, remove it.
- Next, if the coils are covered in dust, clean them with a damp cloth or use a vacuum cleaner. If they are frosted over, let them defrost before cleaning them with a dry cloth.
- Once clean, turn your fridge back on and monitor the compressor over the next few hours to make sure cleaning the coils has solved the problem. If not, proceed to the next step.
Step 3 – Test the condenser fan
Once you’ve ruled out the location of your refrigerator as the cause of the problem, the next step is to test the condenser fan. The condenser fan is there to help the condenser coils stay cool, which in turn helps the compressor stay at the right temperature.
To check the condenser fan, you need to:
- Switch the power off to your fridge and pull it out from the wall.
- Remove the cover of the condenser fan.
- Try to turn the fan around. If the fan cannot move around due to something obstructing it or it’s frosted over, remove the obstruction or let it defrost.
- Next, test the fan with a multimeter for continuity.
- To test the fan, you first need to disconnect the fan motor.
- Once disconnected, test the fan motor for continuity. If the test shows no continuity, the fan needs to be replaced. If it passes the test, move on to the next step.
- To make sure replacing the fan has fixed your compressor, turn your fridge back on and, over the next few hours, monitor the compressor. If it’s still getting too hot, proceed to the next step.
Step 4 – Test the temperature control thermostat
The temperature control thermostat is responsible for telling the control board how much voltage to send to the evaporator fan motor, the compressor, and the condenser fan motor. If the thermostat fails to do its job, the compressor will overheat.
Here’s how to check the temperature control thermostat:
- Open your refrigerator door and locate the thermostat.
- Start by trying to turn the thermostat from the lowest setting to the highest and listen for a clicking sound. If you can hear a clicking sound, this indicates that the thermostat is working properly. If you cannot hear a clicking sound, this indicates that it’s faulty.
- Before moving on to the next step or replacing the thermostat, it’s a good idea to test it with a multimeter for continuity.
- To test the thermostat, you first need to switch the power off and then disconnect the thermostat.
- Once disconnected, test the thermostat for continuity. If the test shows no continuity, the thermostat needs to be replaced. If it passes the test, move on to the next step.
- To make sure replacing the thermostat has fixed your compressor, turn your fridge back on and, over the next few hours, monitor the compressor. If it’s still getting too hot, proceed to the next step.
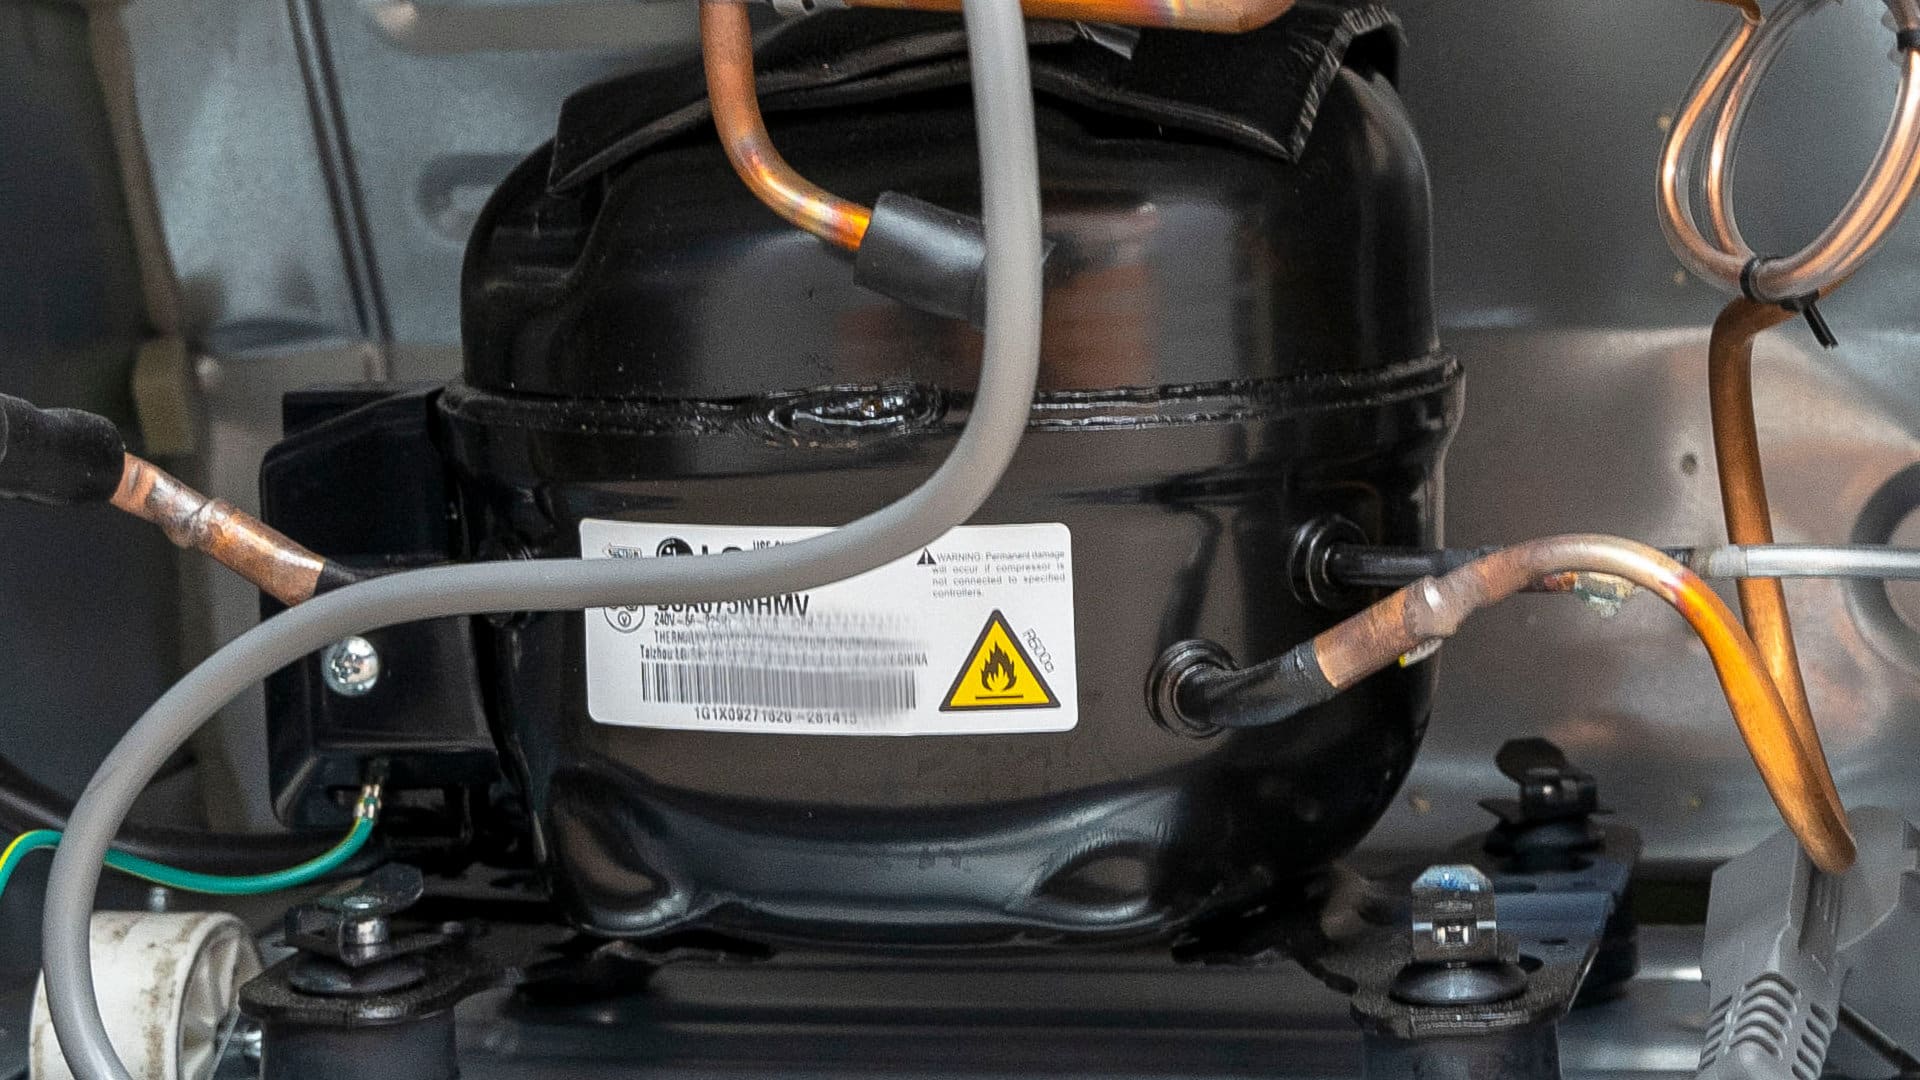
Step 5 – Inspect the compressor
If you’ve ruled out the location of your fridge, dirty condenser coils, a faulty condenser fan, and a faulty thermostat as the cause of the problem, the final step is to inspect the compressor unit itself. If the compressor is damaged it won’t be able to compress the refrigerant properly, which will result in it overheating. The reason inspecting the compressor is the final step is because it’s very dangerous to work with. You shouldn’t carry out the inspection of the compressor unless you’re qualified to do so.
Here’s how to check the compressor unit:
- Double check that the power is turned off.
- Locate the compressor unit.
- First, make sure there are no obvious leaks. If you find a leak, the compressor will need to be replaced.
- Next, test the compressor with a multimeter. You need to place the probes on the electrical pins that are on the side of the compressor.
- If the compressor fails the multimeter test, it will need to be replaced. However, given the cost and complexity of replacing a compressor, you may decide at this point that you’re better off purchasing a new refrigerator.
(323) 284-6780Give us a call!

Apr. 09, 2024
How to Fix the Whirlpool Washer F9 E1 Error Code

Apr. 09, 2024
How to Solve Frigidaire Dishwasher Lights Blinking

Apr. 09, 2024
Resolving the LG Washer UE Error Code (3 Easy Fixes)

Mar. 06, 2024
Replacing an Over-the-Range Microwave with a Range Hood

Mar. 06, 2024
How to Get Burnt Smell Out of Microwave (In 2 Easy Steps)

Mar. 06, 2024
7 Reasons Why Your Bosch Ice Maker Is Not Working

Feb. 05, 2024
Why Does Your Self-Cleaning Oven Smell?

Feb. 05, 2024
Why Is Your Whirlpool Cabrio Washer Not Spinning?

Jan. 03, 2024
Why Does My Refrigerator Make Noise?

Jan. 03, 2024
Troubleshooting the F2 Error Code on a Whirlpool Oven

Jan. 03, 2024
Rust Inside Microwave: Causes, Fixes, and Prevention Tips

Dec. 11, 2023
4 Ways to Get Smell Out of Dishwasher

Dec. 11, 2023
7 Steps to Fix a Whirlpool Oven Not Heating

Dec. 11, 2023
What to Do When Your Washing Machine Smells Like Rotten Eggs

Nov. 06, 2023