


September 10, 2018
Dryer Repair
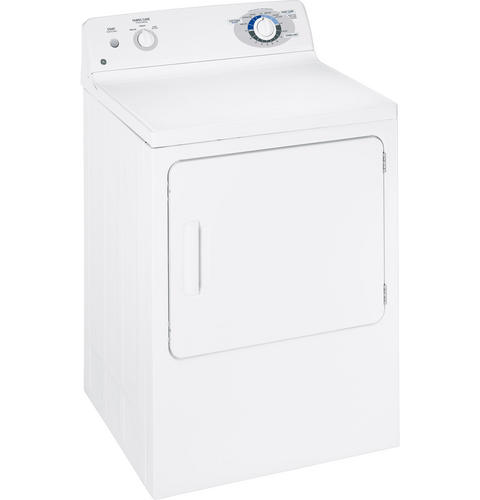
The blower wheel in your GE dryer model DBLR333GGWW circulates hot air through the dryer drum and out the exhaust vent of your appliance. The wheel is generally made of plastic, and over time can become worn causing air circulation to cease, meaning your clothing won’t dry or it may take several cycles before your garments fully dry. While improper drying is the most recognizable symptom of a faulty blower wheel, a high pitched squealing or a loud rumbling can also indicate the part is malfunctioning. A defective blower wheel in your dryer will need to be replaced. If you plan on swapping out the faulty blower wheel for a new one, the step-by-step repair guide provided below will help you.
How to Replace the blower Wheel in Your GE Dryer
Before starting the repair, unplug your dryer or turn it off at the circuit breaker to avoid electrocution. Protect your eyes and hands by wearing safety goggles and work gloves while you work on your appliance.
-
To gain access to the blower wheel you will need to disassemble your dryer. Start by removing the screws at the top of the control panel. Once the screws are out, tilt the panel forward to disengage the three locking tabs on the bottom of the console. Rotate the control panel back and rest it on the back of the dryer.
-
Open the dryer door and unthread the two screws securing the front panel. Close the door and remove the dryer’s top panel by lifting it up and pulling it forward.
-
Now that the top panel is out of the way, take out the screws that attach the front panel to the dryer cabinet. Before you can completely remove the front panel, you will need to disconnect the door switch. To do so, lean the panel forward far enough to see the metal shield blocking the door switch. Swing the shield out of the way and disconnect the wires from the door switch. Make sure you remember the correct placement of the wires for reassembly. Remove the front panel from the cabinet and place it somewhere safe.
-
Next, you’ll need to remove the dryer drum. To do so, unthread the screws securing the support panel to the dryer cabinet. Reach under the drum and push down on the idler pulley to release tension on the belt. Once enough slack is created, take the belt off the pulley and the motor shaft. Use the belt to help guide the drum out of the cabinet.
-
With the drum out of the way, you have now gained access to the blower housing. Detach the thermostat from the side of the housing and set the part down on the dryer floor. Remove the two screws at the front of the support panel. Reach behind the blower motor and unthread the screws securing the motor to the dryer floor. Carefully guide the blower out of its housing. The idler pulley may fall off when you move the motor, but don’t worry, you can put it back on during reassembly. Once the blower motor is free, use a 3/8″ nut driver to remove the screw that holds the clamp on the wheel. Pull the screw and front half of the clamp off the blower wheel. Take the faulty blower wheel off the motor shaft. You can leave the back half of the clamp on the motor shaft.
-
Slide the new blower wheel onto the motor shaft. Line up the hole in the wheel with the back half of the clamp. Place the front half of the clamp back on the shaft, and reattach the screw to secure the blower wheel. Spin the blower a few times to ensure it is not loose.
-
Before you can guide the motor back into the blower housing, you need to reattach the idler pulley. To do so, lean the motor slightly sideways and maneuver the pulley underneath the wires connected to the motor. At the front of the motor, there is a small notch, insert the end of the idler pulley into the notch. Hold the pulley with one hand as you place the motor back down. Push the motor into the blower housing and secure it to the dryer floor. After the motor is reattached to the floor, reinsert the screws in the front support panel. Next, reconnect the thermostat to the side of the blower.
-
Now that the new blower wheel is installed, you can start putting your dryer back together. Using the belt to lift up the drum, carefully maneuver it into the dryer cabinet. The shaft on the back of the drum should go into the opening in the dryer’s rear wall. Once the drum is in place, let the belt rest, ribbed side down, on the drum. Kneel down and reach underneath the drum to thread the belt around the motor shaft and the idler pulley in a letter Z formation. After the belt is reattached, spin the drum a few times to align the belt. Reinstall the screws that secure the support panel to the dryer cabinet.
-
Reattach the dryer’s front panel by lining the panel up with the mounting brackets located on the bottom of the cabinet. Slightly raise the panel to reconnect the door switch. Lift up the dryer drum and snap the front panel into place. Reinsert the screws securing the front panel to the dryer cabinet.
-
To put the top panel back on your dryer, align the slots on the top with the tabs on the frame. Once the panel is in place, open up the dryer door and reinstall the screws to hold the top panel down.
-
Flip the control panel back down, and insert the three tabs on the bottom of the panel into the three slots in the dryer cabinet. Snap the control panel back onto the dryer. Reattach the screws to the back of the control panel to secure it to the appliance.
-
With the new blower wheel installed and your dryer reassembled, the time to plug your appliance back in and test your repair has arrived.
Your newly installed blower wheel should have solved your wet clothes issue, however, if your garments are still damp after a dry cycle, please contact us today to schedule a repair appointment with one of our highly trained technicians.
(323) 284-6780Give us a call!

Apr. 09, 2024
How to Fix the Whirlpool Washer F9 E1 Error Code

Apr. 09, 2024
How to Solve Frigidaire Dishwasher Lights Blinking

Apr. 09, 2024
Resolving the LG Washer UE Error Code (3 Easy Fixes)

Mar. 06, 2024
Replacing an Over-the-Range Microwave with a Range Hood

Mar. 06, 2024
How to Get Burnt Smell Out of Microwave (In 2 Easy Steps)

Mar. 06, 2024
7 Reasons Why Your Bosch Ice Maker Is Not Working

Feb. 05, 2024
Why Does Your Self-Cleaning Oven Smell?

Feb. 05, 2024
Why Is Your Whirlpool Cabrio Washer Not Spinning?

Jan. 03, 2024
Why Does My Refrigerator Make Noise?

Jan. 03, 2024
Troubleshooting the F2 Error Code on a Whirlpool Oven

Jan. 03, 2024
Rust Inside Microwave: Causes, Fixes, and Prevention Tips

Dec. 11, 2023
4 Ways to Get Smell Out of Dishwasher

Dec. 11, 2023
7 Steps to Fix a Whirlpool Oven Not Heating

Dec. 11, 2023
What to Do When Your Washing Machine Smells Like Rotten Eggs

Nov. 06, 2023