


May 4, 2022
Dryer Repair
If your dryer is producing excessive condensation, the issue can be fixed by clearing out the dryer’s ventilation. When the ventilation is blocked, the air is unable to be properly ventilated, which causes condensation. Fixing the issue may require cleaning the lint filter, disassembling the dryer, or using a ventilation cleaning kit to clean the duct. However, the first thing to check is the placement of the dryer.
1. Check the placement of the dryer
If the dryer does not have any ventilation or is located in a cold space like a garage, it will most likely lead to condensation. If the dryer’s ventilation does not have enough space, it may be kinked, squashed, or blocked, causing the condensation issue.
To fix the condensation issue, the dryer may need to be moved, or ventilation or an extractor fan may need to be installed.
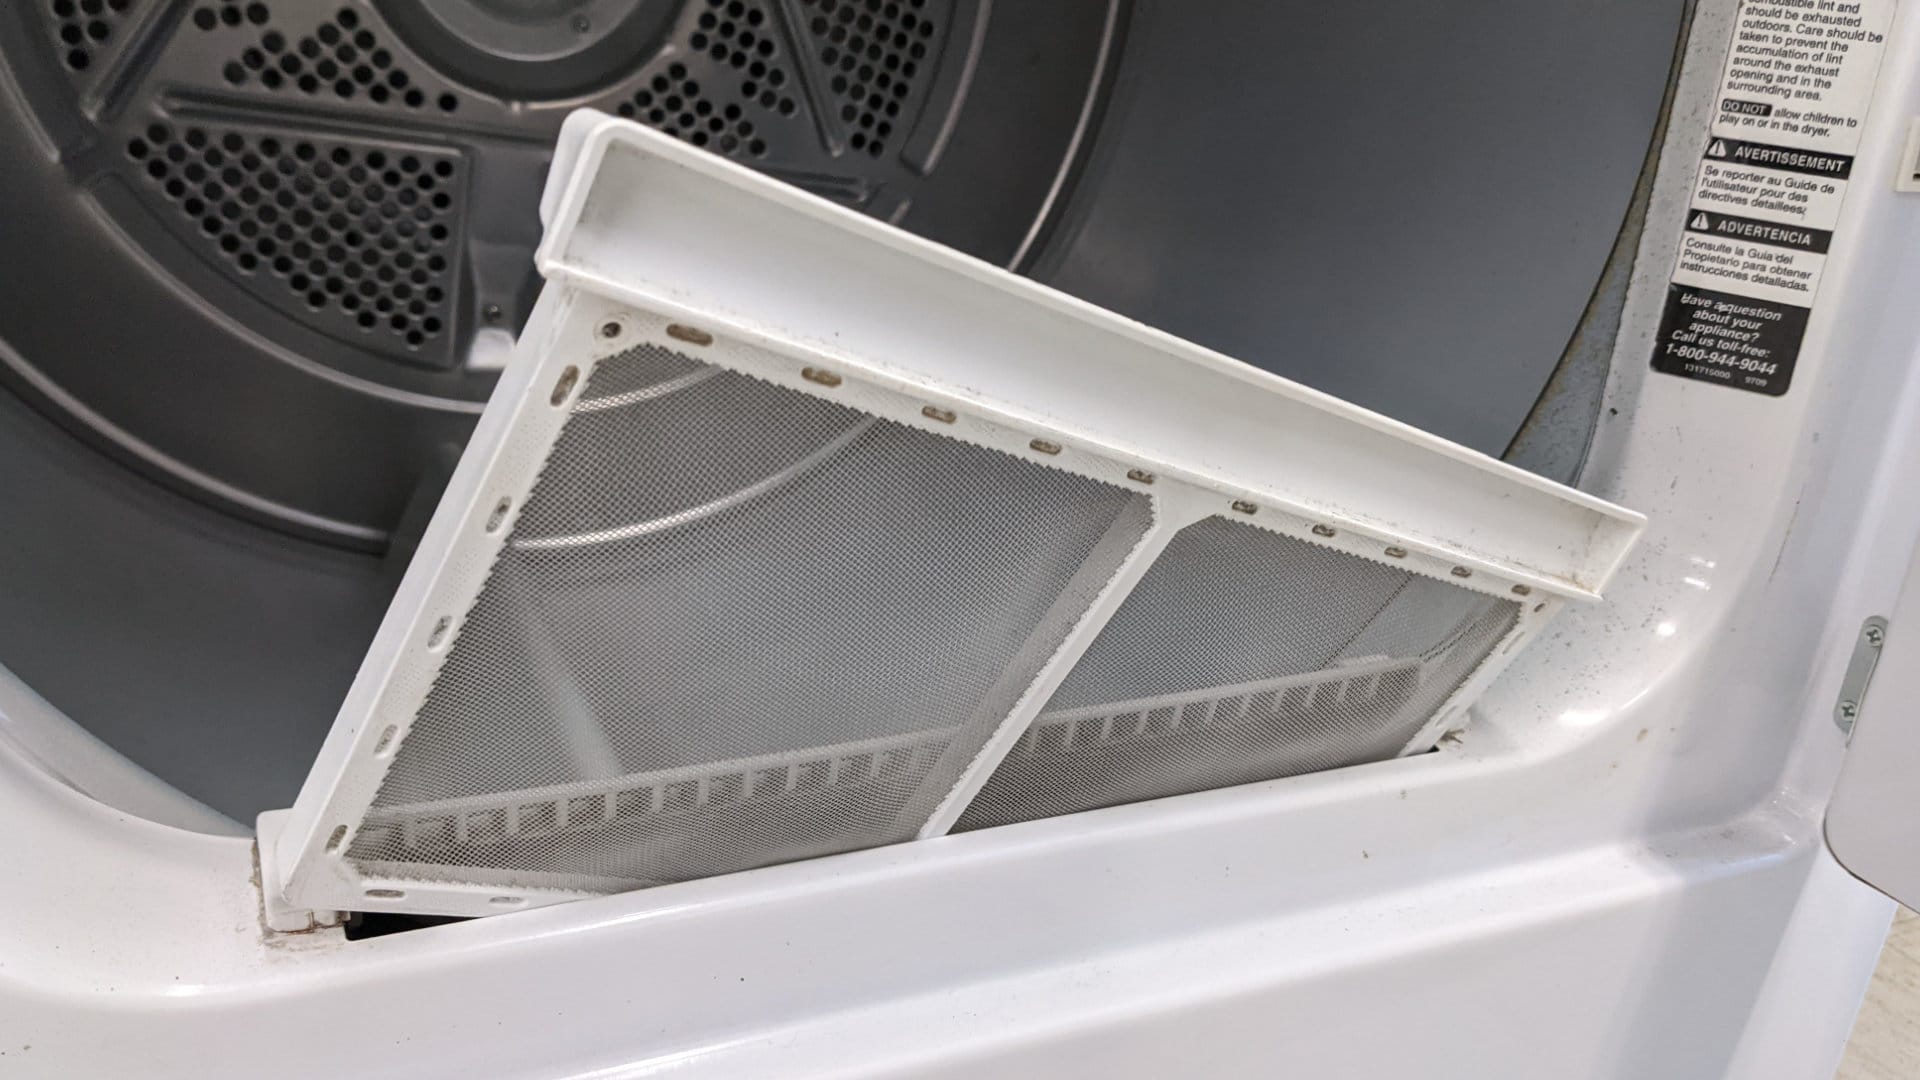
2. Clean the lint filter
The dryer’s lint filter (lint trap) should be cleaned after every cycle. If the lint trap is not frequently cleaned, the lint will build up and clog the ventilation.
Follow these steps to clean the lint filter:
- Remove the lint filter and either vacuum the lint from it or tip the lint into the trash.
- Clean the lint filter with dish soap, warm water, and a gentle scrubbing brush.
- Vacuum and clean around the slot that the lint filter goes into.
- If there is a lot of lint behind the lint filter slot, remove the relevant panels and vacuum the lint.
3. Clean the dryer ventilation tube
The dryer’s ventilation tube is typically at the back of the dryer, where it connects it to the ventilation duct. Depending on the dryer, the ventilation tube may be attached to another lint filter. If your dryer does not have a ventilation tube, move on to the next step.
Follow these steps to clean the ventilation tube:
- Disconnect the power or turn off the gas to the dryer.
- Move the dryer out so that you can unscrew the ventilation tube. If you have a gas dryer, be careful not to damage the gas line.
- Remove the screws that secure the ventilation tube or panels that secure the tube. Depending on the dryer, the tube may be attached with clamps that you should remove instead of screws.
- Clean the lint from the ventilation tube with either a vacuum or brush.
4. Clean inside the dryer
Over time, even if you frequently clean the lint filter, lint can accumulate inside the dryer, especially around the blower wheel and ventilation tube at the back of it. If you haven’t already, a rear panel on the dryer should be removed to clean the lint from inside the dryer. If a rear panel cannot be removed, the dryer may need to be disassembled, starting with the front panel and then the top panel.
Follow these steps to clean inside the dryer:
- Make sure the power has been disconnected or the gas turned off.
- Remove the relevant panels to check the inside of the dryer for lint.
- Vacuum any lint that you find inside the dryer.
5. Clean the dryer ventilation duct
Typically, most households have a dryer ventilation duct that runs from inside the home to the outside. Depending on how often the dryer is used, the duct should be cleaned every 1-2 years to prevent fires from starting. While not as serious as the fire risk, not cleaning the duct can also lead to condensation issues.
Experts recommend a dryer duct that is made of rigid metal, as a rigid metal duct has a smooth interior that encourages the flow of air and lint. Rigid metal is also less of a fire risk. If your duct is made of something else, perhaps vinyl or plastic, it is recommended to replace the duct with rigid metal. Replacing the duct could also solve the condensation problem as the duct may be prone to lint blockages that cause condensation (as well as being a fire risk).
The dryer duct can be cleaned with a dryer vent cleaning kit, which should come with an extendable and flexible brush designed for cleaning dryer ducts. Another option is to have it professionally cleaned.
6. Check the outside exit point of the duct
One final thing to check is that the dryer duct opens to the outside without impediments. This is particularly important for dryer ducts with flaps on the end that open when the air pressure is expelled from the dryer. However, it is also important to check that nothing is blocking the dryer duct as well.
Follow these steps to check the dryer duct:
- Run a short dryer cycle.
- Locate where the dryer duct exits the home.
- Check that air is coming out of the dryer duct.
If you have followed all of the steps above, you should now have a strong and continuous flow of air coming out of the dryer duct. The condensation issue should also be solved.
The bottom line
Condensation is caused by warm and moist air that encounters colder air or a surface. If your dryer is producing condensation, it is most likely because of a ventilation blockage that isn’t allowing air to flow properly out of the dryer. The dryer’s lint filter, inside, ventilation tube, and ventilation duct should be cleaned to fix the issue.
(323) 284-6780Give us a call!

Apr. 09, 2024
How to Fix the Whirlpool Washer F9 E1 Error Code

Apr. 09, 2024
How to Solve Frigidaire Dishwasher Lights Blinking

Apr. 09, 2024
Resolving the LG Washer UE Error Code (3 Easy Fixes)

Mar. 06, 2024
Replacing an Over-the-Range Microwave with a Range Hood

Mar. 06, 2024
How to Get Burnt Smell Out of Microwave (In 2 Easy Steps)

Mar. 06, 2024
7 Reasons Why Your Bosch Ice Maker Is Not Working

Feb. 05, 2024
Why Does Your Self-Cleaning Oven Smell?

Feb. 05, 2024
Why Is Your Whirlpool Cabrio Washer Not Spinning?

Jan. 03, 2024
Why Does My Refrigerator Make Noise?

Jan. 03, 2024
Troubleshooting the F2 Error Code on a Whirlpool Oven

Jan. 03, 2024
Rust Inside Microwave: Causes, Fixes, and Prevention Tips

Dec. 11, 2023
4 Ways to Get Smell Out of Dishwasher

Dec. 11, 2023
7 Steps to Fix a Whirlpool Oven Not Heating

Dec. 11, 2023
What to Do When Your Washing Machine Smells Like Rotten Eggs

Nov. 06, 2023